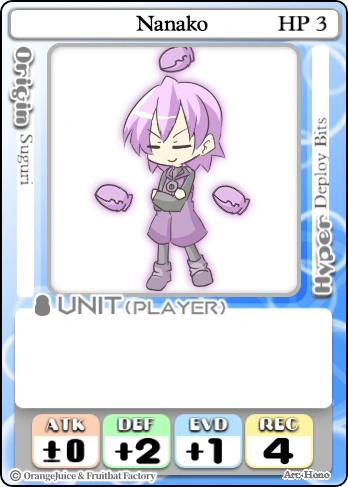
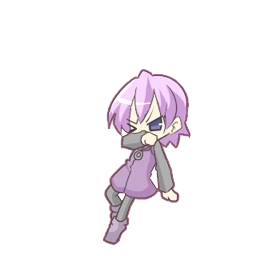
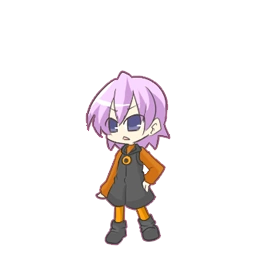
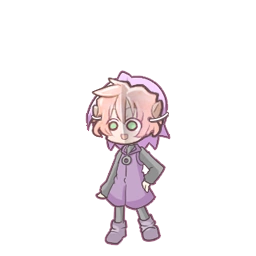
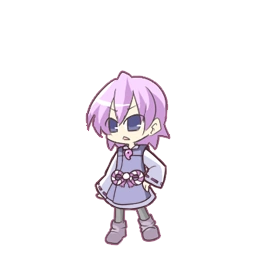
Nanako (ななこ Nanako) is one of the playable characters in 100% Orange Juice!. She was added to the game in DLC 1 alongside .
Passives
None.
Overview
Possessing a small stature and abrasive disposition, Nanako is a sharp-tongued warrior, ready to fight with the help of her 7 Bits. Nanako herself sports an unusual stat spread, featuring a very low HP stat of 3, but splendid bulk thanks to her boosts in both defense and evasion, alongside a reduced REC stat that makes her hard to keep down. Despite her low HP, Nanako's primary advantage is that she is the only character in the cast with both +2 DEF and +1 EVD, which means that she takes, on average, the least amount of damage from any character with neutral ATK, the consistently lowest against -1 ATK ( and can both take less but only temporarily), and the second-lowest from +1 ATK (only bested in this regard by , who cannot even evade low rolls). Given the right matchup and luck, Nanako can be deceptively difficult to KO, as her tank-like DEF enables her to survive big hits, and her EVD enables the player to avoid weak attacks from both opponents and ![]() Encounter panels. As a result of these stats, battles will generally only chip off a single point of HP from Nanako, which can be easily healed off by reaching a
Encounter panels. As a result of these stats, battles will generally only chip off a single point of HP from Nanako, which can be easily healed off by reaching a ![]() Home panel or using healing cards. These stats also enable the player to be able to benefit from a slew of protective cards such as
Home panel or using healing cards. These stats also enable the player to be able to benefit from a slew of protective cards such as ![]() Shield Counter and
Shield Counter and ![]() Rainbow-Colored Circle. Likewise, thanks to her improved REC stat, should the player be KO'd, they will likely be able to get back into the game quicker and have some slight comeback potential. Given her low HP, the player can also possibly benefit from certain board effects to avoid being KO'd. , , and
Rainbow-Colored Circle. Likewise, thanks to her improved REC stat, should the player be KO'd, they will likely be able to get back into the game quicker and have some slight comeback potential. Given her low HP, the player can also possibly benefit from certain board effects to avoid being KO'd. , , and ![]() Mimyuu's Hammer can save the player if they are on 1 HP, and can make Nanako very difficult to KO.
Mimyuu's Hammer can save the player if they are on 1 HP, and can make Nanako very difficult to KO.
Unfortunately, Nanako's main faults are linked to her statline failing to deter opponents, as well as the similarly designed overshadowing much of her kit. While Nanako's buffed EVD and tank-like DEF can theoretically keep the player alive, its usefulness is diminished by her neutral ATK and low HP. Without an ATK modifier, more aggressive opponents like are generally willing to challenge the player at any opportunity, as they expect mediocre retaliation (though this is ill-advised if Nanako is holding onto plenty of cards). Consequently, Nanako's stat prowess is undermined by her low HP, which is not designed for sustained combat. If constantly defending, the player can only survive 2 attacks, and if the opponent rolls a 3, using evade is already risky, as a roll of 1-2 will result in a KO. In short, Nanako is often treated like a sidegrade to , as the player is often unwilling to evade, unable to KO the pursuer, and must be lucky enough to ![]() Warp, roll far away, or have cards on hand to prevent Nanako from being KO'd. While her offensive issues can possibly be overcome with offensive cards such as
Warp, roll far away, or have cards on hand to prevent Nanako from being KO'd. While her offensive issues can possibly be overcome with offensive cards such as ![]() I'm on Fire! or
I'm on Fire! or ![]() Big Magnum, her low HP makes it inadvisable to sacrifice her DEF or HP. Likewise, if the player is KO'd, they may have difficulty mounting a comeback play, as a result of Nanako's fickle Hyper. Given these flaws, many players consider Peat to be a safer/better character, as the threat of +1 ATK is more frightening than an additional point in DEF, and his
Big Magnum, her low HP makes it inadvisable to sacrifice her DEF or HP. Likewise, if the player is KO'd, they may have difficulty mounting a comeback play, as a result of Nanako's fickle Hyper. Given these flaws, many players consider Peat to be a safer/better character, as the threat of +1 ATK is more frightening than an additional point in DEF, and his ![]() Hyper, although technically weaker, is far more consistent. With such a low HP stat, HP becomes priceless, and thus simple -1 HP effects can be extremely detrimental to the player's success when they are not at 1 HP.
Hyper, although technically weaker, is far more consistent. With such a low HP stat, HP becomes priceless, and thus simple -1 HP effects can be extremely detrimental to the player's success when they are not at 1 HP.
Summary
- Pros
- + Excellent defensive stats make it likely to survive one or two high attack rolls
- + Cheap battle Hyper that remains powerful even in an almost empty hand
- + Fast revivals allow her to take revenge on fragile bullies
- Cons
- - Randomness of Hyper's stat distribution can turn against her
- - Average ATK stat makes her easy to pick on when she doesn't have her Hyper
Update History
Effect
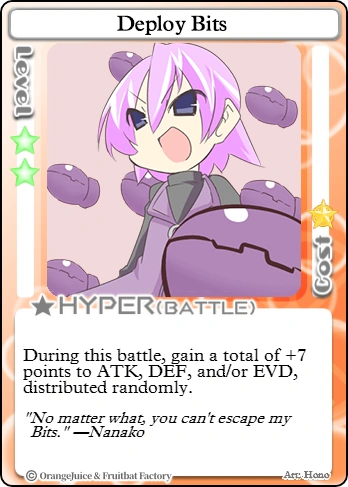
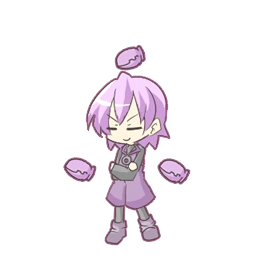
Nanako's Hyper is Deploy Bits. When used in a battle, the player gains a total of +7 points distributed at random to their ATK, DEF, and/or EVD stats.
Strategy
Deploy Bits gives Nanako surprise potential as her low HP and average ATK make her a character who isn't as suited to fighting as to defending. The gains from her Hyper can alter the current battle depending on her fortune with the +7 overall stat distribution.
Quantifying this Hyper leads to the conclusion that the average gain to each stat would be +2.33, leaving Nanako with a statline of +2/+4/+3 (with one added point given to a single of the three). Not only does this guarantee that she avoids anything below a 4, but it also allows her to survive an ATK roll as high as 12, which can be achieved under certain circumstances like extreme stacks of 's passive, ![]() Accelerator or
Accelerator or ![]() Accel Hyper. While +2 ATK is also nothing to scoff at (and it can potentially go higher with some redistribution), it, in a similar vein to
Accel Hyper. While +2 ATK is also nothing to scoff at (and it can potentially go higher with some redistribution), it, in a similar vein to ![]() Hyper Mode, is not enough to make reliable offensive plays unless an enemy is at low HP or the player is desperate, at least when layered atop Nanako's neutral offences. This leads to its best use case being as a surprise tool when an enemy tries to pick her off or otherwise rob her, as it can quickly lead to the tables turning.
Hyper Mode, is not enough to make reliable offensive plays unless an enemy is at low HP or the player is desperate, at least when layered atop Nanako's neutral offences. This leads to its best use case being as a surprise tool when an enemy tries to pick her off or otherwise rob her, as it can quickly lead to the tables turning.
Playstyle
As Nanako, the player will generally play passively and focus on star norma. The player will want to focus on ![]() Draw and
Draw and ![]() Bonus panels, and bring healing and defensive cards to benefit from Nanako's innate defensive strengths.
Bonus panels, and bring healing and defensive cards to benefit from Nanako's innate defensive strengths.
Tips
- Playing As Nanako
- Nanako takes, on average, the least amount of damage out of anyone on the roster against neutral ATK (0.83), the second-least against -1 ATK (0.58, only and in her Full Moon form beat this at 0.53), and also the second-least against +1 ATK (1.13, which is only bested by at 1.11). Her shocking durability is lent to her aptitude in tanking moderately high rolls fairly well, while usually dodging anything lower than a 3. It is important to moderate your HP and your competition at any opportunity, prioritize
 Home and
  Heal panels for added restoration, as well as
  Draw panels for expanded options.
  Saki's Cookie is by far her best healing card, recovering an entire third of her HP with each usage, while being less effective for a good chunk of the roster that has a higher HP stat or relies more on evasion. Constant recovery is key for her, as she will always be taking chip damage, and cannot survive prolonged combat.
  Dinner and
  Pudding are usable, but not as advisable, as they are much more helpful on other characters.
- Nanako's prime defensive option is
 Quick Restoration, practically fixing the damage she takes to 0 as long as the difference between her rolls and that of her foe's are not polarizing. As with ,
  Portable Pudding is also a fantastic choice if you feel less than confident in evading.
  Desperate Modification can also help against flimsier attackers, but is not the best card to bring thanks to its steep benefit for aggressors like and in her Devil form.
 - As Nanako's
 Hyper is often best used as a retaliatory tool, it is usually safe to bring
  Shield and
  Shield Counter to help minimize the advances of aggressors (playing Nanako offensively is suboptimal in the first place). They can easily shut her out of making a comeback if she suffers an unlucky death, though.
 - Getaway options like
 Here and There,
  Go Away and
  Serene Hush help Nanako avoid potential certain death scenarios a lot more easily, while not necessarily harming her as much due to her passive playstyle (unless she is warped to a cluster of
  Encounter panels during a Battlefield field event).
- Playing Against Nanako
- Card control absolutely debilitates Nanako, as her stats mean very little if she has no way of circumventing brute force from piercing her paper-thin core such as steady heals.
 Bad Pudding and
  Flamethrower are among the prime options, with
  Gift Exchange being the most brutal, as it puts one of the game's most potent lead stealers in the hands of an enemy player more often than not.
 - For similar reasons,
 Mimic is also a card that Nanako should avoid decking.
 - Cards that impact Nanako's statline like
 Poppoformation,
  Reverse Attribute Field and
  Serious Battle also devastate her, turning her from a potent sub-tank into an absolutely paper-thin rascal with almost no redeeming qualities. Though less impactful,
  alters her statline in a way that makes her take slightly more damage on average for a whole 3 chapters, as it drops her DEF in turn for a slight EVD boost, which hardly matters to her as evading a 3 is usually a desperation move to begin with.
 - Out-of-damage battle cards, especially
 Long-Distance Shot, make Nanako especially prone to getting sniped, especially when paired with characters that have means of dealing indirect combat damage such as .
 - Offensive cards like
 I'm on Fire!,
  Big Magnum and
  Super All-Out Mode makes Nanako's shell much easier to crack, while not aiding her as much thanks to the harsh tradeoffs each card has contextually.
  Accel Hyper, though more usable by her, is also not worth bringing, as she will die to it on average if the user has at least +1 ATK.
Recommended Cards
| Standard | Recommended | Viable |
|
|
|
Counter Cards
Co-op
Nanako's stats, passive, and Hyper are unchanged in Co-op mode.
| Co-op Rank | ||||
|---|---|---|---|---|
| C | A | B | E | D |
Bounty Hunt
Nanako's passive and Hyper are unchanged in Bounty Hunt mode.
Nanako's base stats give her 32 starting stars and a markup of +20% at shops.
Character
To unlock Nanako as a playable character, along with her unit card and Hyper card as binder collectibles:
- Own DLC 1.
Unit Colors
| Name | Current Unlock Conditions |
|---|---|
| Receive as a random drop after finishing an online game. | |
| Purchase for 20000 | |
| Purchase for 10000 | |
| Receive as a random drop after finishing an online game. | |
| Purchase for 20000 | |
| Purchase for 40000 | |
| Purchase for 60000 | |
|
Hair Colors
| Name | Current Unlock Conditions |
|---|---|
| Hair Color |
Finish 10 games as Nanako, with the 10th game or any game after the 10th being online. |
| Hair Colors |
Receive as a random drop after finishing an online game. |
| Hair Colors |
|
Accessories
| Name | Current Unlock Conditions |
|---|---|
| Purchase for 5000 | |
| Receive as a random drop after finishing an online game as Nanako. | |
| Receive as a random drop after finishing an online game as Nanako. | |
| Complete all base-game campaigns and extra episodes on Normal difficulty or higher. | |
| Complete all base-game campaigns and extra episodes on Extreme difficulty. | |
| Purchase for 20000 | |
| Receive randomly from the Mystery Bag. | |
| Purchase for 99999 | |
| Receive randomly from the Mystery Bag. | |
| Complete Waruda Christmas Party on any difficulty. | |
| Purchase for 50 | |
| Currently unavailable. | |
| Currently unavailable. | |
| Currently unavailable. | |
| Purchase for 60 | |
| Currently unavailable. | |
| Purchase for 80 | |
| Receive as a random drop after finishing an online game as Nanako. |
| Name | Current Unlock Conditions |
|---|---|
| Receive as a random drop after finishing an online game. | |
| Receive randomly from the Mystery Bag. |
Other
| Name | Current Unlock Conditions |
|---|---|
| Poses |
Receive randomly from the Regular Crate. |
| OJDex Entry 2 | Finish 5 online games as Nanako. |
| OJDex Entry 3 | Finish 10 online games as Nanako. |
| OJDex Entry 4 | Finish 15 online games as Nanako. |
| OJDex Entry 5 | Finish 25 online games as Nanako. |
| Flying Nanako plate pin | Finish 50 online games as Nanako. |
Achievements
| Icon | Name | Requirement |

|
Bit by Bit | Finish 10 games as . |

|
Fully Deployed | As , use |

|
Orders Are Absolute | As , KO in battle. |
Poses

Colors


Hairs


Accessories


Glasses


Voice Lines
| When | Name | English | Japanese | ||||
|---|---|---|---|---|---|---|---|
| Rolling dice | Rolling dice 1 | ▶️ | ⏏️ | Hah! | ふん | ||
| Rolling dice 2 | ▶️ | ⏏️ | There! | それ | |||
| Rolling dice 3 | ▶️ | ⏏️ | Ey! | えいっ | |||
| Rolling dice 4 | ▶️ | ⏏️ | Yah! | やー! | |||
| Using Boost/Event/Gift/Quest/Bounty card | Use card 1 | ▶️ | ⏏️ | I'll play this! | これを使うわよ! | ||
| Use card 2 | ▶️ | ⏏️ | It's time to use this. | これの出番ね | |||
| Use card 3 | ▶️ | ⏏️ | Starting now...! | ここからが…! | |||
| Use card 4 | ▶️ | ⏏️ | With this... | これで… | |||
| Placing Trap card | Trap card 1 | ▶️ | ⏏️ | Trap! | トラップよ | ||
| Trap card 2 | ▶️ | ⏏️ | I guess I'll bury this around here. | この辺に埋めておこうかしら | |||
| Trap card 3 | ▶️ | ⏏️ | Trap card! | トラップカード! | |||
| Trap card 4 | ▶️ | ⏏️ | Let's see which one of the idiots will fall for it. | さーて、引っかかる馬鹿はいるかしら | |||
| Using Battle card | Battle card 1 | ▶️ | ⏏️ | I'll show you all how flawless my strategies are! | 華麗な戦術を見せてあげるわ! | ||
| Battle card 2 | ▶️ | ⏏️ | Well, I wonder... how more powerful will I get? | さて、パワーアップの効果はいかほどかしら | |||
| Battle card 3 | ▶️ | ⏏️ | How about you dance to my fists? | 私の掌で踊りなさい | |||
| Battle card 4 | ▶️ | ⏏️ | As they say, better safe than sorry. | 念には念をってね | |||
| Using Deploy Bits | Hyper card 1 | ▶️ | ⏏️ | Here we go, bits! | いくわよ!ビット! | ||
| Reviving | Revived 1 | ▶️ | ⏏️ | I can't be lying down forever. | いつまでも倒れていられないのよ | ||
| Revived 2 | ▶️ | ⏏️ | Fufufu! I'm back! | ふふふ! ここからよ! | |||
| Revived 3 | ▶️ | ⏏️ | All right then, it's revenge time. | さてと…リベンジ始めましょうか | |||
| Revived 4 | ▶️ | ⏏️ | Enough resting. | 休憩はここで終わりよ | |||
| Revive roll failed | Revive failed 1 | ▶️ | ⏏️ | Tsk, I screwed up... | ちっ、ミスった… | ||
| Revive failed 2 | ▶️ | ⏏️ | I guess I'll rest for a bit longer. | もう少し休んでようかしら | |||
| Revive failed 3 | ▶️ | ⏏️ | Ahh damn it! | あーもう! | |||
| Revive failed 4 | ▶️ | ⏏️ | Why?! | なんでなのよ! | |||
| (Attack)/Snowball Attack/Bounty Attack | Attack 1 | ▶️ | ⏏️ | Let's get ourselves ready! | 仕掛けるわ! | ||
| Attack 2 | ▶️ | ⏏️ | Go, bits! | いきなさい!ビット! | |||
| Attack 3 | ▶️ | ⏏️ | I'm shooting you down! | 撃ち込むわ! | |||
| Attack 4 | ▶️ | ⏏️ | You can go ahead and sink! | 沈みなさい! | |||
| Taking out-of-battle damage | Effect Damage 1 | ▶️ | ⏏️ | Ugh! | くぅ! | ||
| Effect Damage 2 | ▶️ | ⏏️ | That hurts! | 痛いじゃないのよ! | |||
| Effect Damage 3 | ▶️ | ⏏️ | Damn! | もう! | |||
| Effect Damage 4 | ▶️ | ⏏️ | Knock it off! | やめなさいよ! | |||
| Healing | Healing 1 | ▶️ | ⏏️ | I'm being healed... | 癒やされるわ | ||
| Healing 2 | ▶️ | ⏏️ | Now I can keep going. | これでまだやれるわね | |||
| Healing 3 | ▶️ | ⏏️ | I like this. | これはいいわね | |||
| Healing 4 | ▶️ | ⏏️ | It's warm. | 温かい | |||
| Warping | Warp 1 | ▶️ | ⏏️ | Where will I end up? | さてと、どこに飛ぶかしら | ||
| Warp 2 | ▶️ | ⏏️ | Treat me with more care, will you?! | もっと丁寧に扱いなさいよ! | |||
| Warp 3 | ▶️ | ⏏️ | I'm flying! | 飛んでいくわ! | |||
| Warp 4 | ▶️ | ⏏️ | What's going on?! | なんなのよこれ! | |||
| KO'd out-of-battle | KO 1 | ▶️ | ⏏️ | I think I need some rest... | ちょっと休憩ね… | ||
| KO 2 | ▶️ | ⏏️ | Ugh... I can't move... | ぐぅ…動けな… | |||
| KO 3 | ▶️ | ⏏️ | I'll go lie down for a bit... | ちょっと眠るわ | |||
| KO 4 | ▶️ | ⏏️ | Ahh, geez, I hate this... | まったくなんなのよもう… | |||
| Battle (Attacker) | Challenging enemy 1 | ▶️ | ⏏️ | Now, are you ready for this? | さぁ、覚悟はいいかしら | ||
| Challenging enemy 2 | ▶️ | ⏏️ | Bits, it's time to fight, okay? | 仕掛けるわよ!いいわね! | |||
| Challenging enemy 3 | ▶️ | ⏏️ | The fun begins here! | 楽しい時間の始まりよ! | |||
| Challenging enemy 4 | ▶️ | ⏏️ | You're just asking to be attacked! | 隙だらけよ! | |||
| Battle (Defender) | Being challenged 1 | ▶️ | ⏏️ | Challenge accepted! Bring it on! | いいわ! かかってらっしゃい! | ||
| Being challenged 2 | ▶️ | ⏏️ | You wanna fight me? What are you, an idiot? | 私に挑むなんて馬鹿なのかしら | |||
| Being challenged 3 | ▶️ | ⏏️ | Fufufu, you'll regret this! | ふふふ、返り討ちよ! | |||
| Being challenged 4 | ▶️ | ⏏️ | Tsk, that's annoying! | ちっ、うざったい! | |||
| Attacking | Attack in battle 1 | ▶️ | ⏏️ | Attack! | アタック! | ||
| Attack in battle 2 | ▶️ | ⏏️ | Shoot! | 撃ちなさい! | |||
| Attack in battle 3 | ▶️ | ⏏️ | Can you dodge this? | 避けられるかしら | |||
| Attack in battle 4 | ▶️ | ⏏️ | In formation! | フォーメーション! | |||
| Light Damage | Damage 1 | ▶️ | ⏏️ | That grazed me...! | かすった…! | ||
| Damage 2 | ▶️ | ⏏️ | Not as much damage as I thought! | この程度! | |||
| Damage 3 | ▶️ | ⏏️ | I screwed up dodging...! | 避けそこねた…! | |||
| Damage 4 | ▶️ | ⏏️ | Argh! | つぅっ! | |||
| Heavy Damage | Major damage 1 | ▶️ | ⏏️ | That hurt! | 痛いじゃない! | ||
| Major damage 2 | ▶️ | ⏏️ | Ugh, can you guys still go on?! | くっ、まだやれる!? | |||
| Major damage 3 | ▶️ | ⏏️ | Kyaah! | きゃあ! | |||
| Major damage 4 | ▶️ | ⏏️ | This isn't good! | やばい! | |||
| Evading | Evasion 1 | ▶️ | ⏏️ | No way it'll hit me! | 当たるわけないじゃない! | ||
| Evasion 2 | ▶️ | ⏏️ | That's a terrible move! | そんな攻撃! | |||
| Evasion 3 | ▶️ | ⏏️ | You missed! | 当たらないわ! | |||
| Evasion 4 | ▶️ | ⏏️ | Where were you aiming for? | どこ狙ってるのよ | |||
| Winning in Battle | Winning a battle 1 | ▶️ | ⏏️ | This is only natural. | 当然ね | ||
| Winning a battle 2 | ▶️ | ⏏️ | You're boring. | 手応えないわね | |||
| Winning a battle 3 | ▶️ | ⏏️ | Is that all you've got? | その程度なの | |||
| Winning a battle 4 | ▶️ | ⏏️ | Are you done already? | あら、もう終わりなの? | |||
| KO'd in Battle/Losing Game | Losing a battle 1 | ▶️ | ⏏️ | Ugh, you're good. | くっ、やるじゃない | ||
| Losing a battle 2 | ▶️ | ⏏️ | This can't be happening to me... | 私がこんな… | |||
| Losing a battle 3 | ▶️ | ⏏️ | Kuuu! | くぅうっ | |||
| Losing a battle 4 | ▶️ | ⏏️ | I'll make you pay for this later, mark my words! | 覚えてなさいよ! | |||
| Bonus Panel | Bonus panels 1 | ▶️ | ⏏️ | Feels good. | いい感じじゃない | ||
| Bonus panels 2 | ▶️ | ⏏️ | I'll gratefully accept these. | ありがたく受け取っておくわ | |||
| Bonus panels 3 | ▶️ | ⏏️ | Come and let me have you all! | 私の元に集まりなさい! | |||
| Bonus panels 4 | ▶️ | ⏏️ | Fufufu... more, much more! | ふふふ…もっともっとよ! | |||
| Drop Panel | Drop panels 1 | ▶️ | ⏏️ | Hey, where do you think you're going?! | ちょっと!どこ行くのよ! | ||
| Drop panels 2 | ▶️ | ⏏️ | My stars...!! Ugh! | 私のスターが…!!くっ! | |||
| Drop panels 3 | ▶️ | ⏏️ | Aargh, damn! | ああもう! | |||
| Drop panels 4 | ▶️ | ⏏️ | I messed up... | しくじったわ… | |||
| Stepping on Trap | Stepping on a trap 1 | ▶️ | ⏏️ | What, a trap?! | トラップですって! | ||
| Stepping on a trap 2 | ▶️ | ⏏️ | This is not acceptable! | 小賢しい! | |||
| Stepping on a trap 3 | ▶️ | ⏏️ | I can't believe there's a trap here! | トラップなんて!! | |||
| Stepping on a trap 4 | ▶️ | ⏏️ | Aargh, screw it all, why is there a trap here?! | ああもう、なんでこんなとこに! | |||
| Vs. Boss | Encountering a boss 1 | ▶️ | ⏏️ | Something huge is here. | 大きい反応があるわね | ||
| Encountering a boss 2 | ▶️ | ⏏️ | Oh boy... I'd better get ready for whatever just showed up. | これは…少し気を引き締めようかしら | |||
| Encountering a boss 3 | ▶️ | ⏏️ | Hmph, I don't like this vibe. | ふん、嫌な雰囲気ね | |||
| Encountering a boss 4 | ▶️ | ⏏️ | Here comes the real thing. | ここからが本番ね | |||
| Star Norma | Star Norma 1 | ▶️ | ⏏️ | I think I'll choose stars. | スターにしようかしら | ||
| Star Norma 2 | ▶️ | ⏏️ | I'll gather stars. | スターを集めましょ | |||
| Star Norma 3 | ▶️ | ⏏️ | I'm going to go for stars, of course. | スターで | |||
| Star Norma 4 | ▶️ | ⏏️ | I'm supposed to get a lot of stars, right? | スターを集めればいんでしょ? | |||
| Wins Norma/Fame Norma | Win Norma 1 | ▶️ | ⏏️ | I choose to fight. | 戦うわ | ||
| Win Norma 2 | ▶️ | ⏏️ | I'll fight and win. | 戦って勝つわ | |||
| Win Norma 3 | ▶️ | ⏏️ | I'm going to get a whole load of wins. | 勝ちまくるわよ | |||
| Win Norma 4 | ▶️ | ⏏️ | Victory's a piece of cake for me. | 勝利なんて容易いわ | |||
| Selecting Character | Selecting character 1 | ▶️ | ⏏️ | I'm Nanako, what's up? | ナナコよ、よろしく | ||
| Selecting character 2 | ▶️ | ⏏️ | Looks like you need my help. | 私の出番ね | |||
| Selecting character 3 | ▶️ | ⏏️ | Okay, I'll go out there with you. | いいわ、いくわよ | |||
| Selecting character 4 | ▶️ | ⏏️ | All right... let's go. | さて…いきましょうか | |||
| Starting Game | Game starts 1 | ▶️ | ⏏️ | We will be the winners. | 勝ちに行くわよ | ||
| Game starts 2 | ▶️ | ⏏️ | Well, how should we do this? | さて、どうでましょうか | |||
| Game starts 3 | ▶️ | ⏏️ | The bits are in great shape too. Let's get this started. | ビットの調子も良好ね、はじめましょうか | |||
| Game starts 4 | ▶️ | ⏏️ | And so the game begins. | ゲームの始まりね | |||
| Winning Game | Winning games 1 | ▶️ | ⏏️ | Well, this is hardly surprising, is it? | ま、当然かしら | ||
| Winning games 2 | ▶️ | ⏏️ | I win... Well, I guess I deserve this. | 私の勝ち… ま、こんなものね | |||
| Winning games 3 | ▶️ | ⏏️ | Being in the first place feels pretty good. | 一番って気持ちいいものね | |||
| Winning games 4 | ▶️ | ⏏️ | Okay then, I think I'll go get something good to eat. | さーて、美味しいものでも食べにいこうかしら | |||
| Item Drop/Crate Drop | Obtaining new stuff 1 | ▶️ | ⏏️ | It's a new item. | NEWアイテムよ | ||
| Obtaining new stuff 2 | ▶️ | ⏏️ | We're stronger now. | 戦力増強ね | |||
| Obtaining new stuff 3 | ▶️ | ⏏️ | That's good to have. | いいものを得たわね | |||
| Obtaining new stuff 4 | ▶️ | ⏏️ | Fufu, you're in luck. | ふふ、運がいいじゃない | |||
| Whack a Poppo/Track the Card | Generic Line 1 | ▶️ | ⏏️ | Okay. | いいわ | ||
| Roll 0 on Drop panel | Generic Line 2 | ▶️ | ⏏️ | That's good. | いいわね | ||
| Whack a Poppo/Snowball Position | Generic Line 3 | ▶️ | ⏏️ | Yeah. | ええ | ||
| Whack a Tomomo/Alte | Generic Line 4 | ▶️ | ⏏️ | No. | いやよ | ||
| Bad Prize | Generic Line 5 | ▶️ | ⏏️ | That's not good. | だめね | ||
| Star Treasure | Generic Line 6 | ▶️ | ⏏️ | You're lucky. | 運がいいわね | ||
| Neutral Prize | Generic Line 7 | ▶️ | ⏏️ | Hm? | ん? | ||
| Battle Prize/Supporter Revive | Generic Line 8 | ▶️ | ⏏️ | Now, let's go. | さぁ、いくわよ | ||
| Generic Line 9 | ▶️ | ⏏️ | I'm throwing the dice. | サイコロを降るわ | |||
| Using Fury/Iron Defense | Generic Line 10 | ▶️ | ⏏️ | Off I go. | いくわよ | ||
| Greeting (Home Screen/Joining Lobby) | Generic Line 11 | ▶️ | ⏏️ | Hi. | はぁい | ||
| Miss Prize/Track the Card | Generic Line 12 | ▶️ | ⏏️ | Hmm. | んー | ||
| Generic Line 13 | ▶️ | ⏏️ | Good work. | やるわね | |||
| Hyper Treasure/Good Prize | Generic Line 14 | ▶️ | ⏏️ | That's fascinating. | すごいじゃない | ||
| Fail Norma check/Roll 0 on Bonus panel/Miss Match/Bad Prize (Match 2) | Generic Line 15 | ▶️ | ⏏️ | Damn, what was that about? | なんなのかしら、もう | ||
| Using Other Hyper | Enemy Hyper 1 | ▶️ | ⏏️ | I'll use this. | 私が使ってあげる | ||
| Enemy Hyper 2 | ▶️ | ⏏️ | So this is that power in my hands... | あれの力…ね | |||
| Enemy Hyper 3 | ▶️ | ⏏️ | I can get the most out of this. | 使いこなしてあげるわ | |||
| Enemy Hyper 4 | ▶️ | ⏏️ | Now, let's see how this'll turn out! | さて、どうでるかしら! | |||
| Special Lines | |||||||
| Vs. Kae (attacking) | Special Line 1 | ▶️ | ⏏️ | Kae, it's play time! | カエ、遊ぶわよ! | ||
| Vs. Kae (defending) | Special Line 2 | ▶️ | ⏏️ | You want play together? Fine, bring it on. | いっしょに遊ぶの? いいわ、かかってらっしゃい | ||
| Defeat Kae | Special Line 3 | ▶️ | ⏏️ | It was fun. We should do this again sometime. | 楽しかったわ。また遊びましょ | ||
| KO'd by Kae | Special Line 4 | ▶️ | ⏏️ | Fufu, you're very good. | ふふ、やるじゃない | ||
| Be on Kyousuke's panel without fighting | Special Line 5 | ▶️ | ⏏️ | Is that you, Kyoko...? No, who the hell are you? | キョウコ…じゃない? アンタ誰よ | ||
| Vs. NoName (attacking) | Special Line 6 | ▶️ | ⏏️ | I really want to smash him down, but at the same time I don't... | 思い切りぶっ飛ばしたいような、やりにくいような… | ||
| Vs. NoName (defending) | Special Line 7 | ▶️ | ⏏️ | Stay away from me, will you? | こっち来ないでもらえるかしら | ||
| Defeat NoName | Special Line 8 | ▶️ | ⏏️ | Do I feel good about this or not... What's wrong with me! | スッキリしたようなしないような… なんなのよもう! | ||
| KO'd by NoName | Special Line 9 | ▶️ | ⏏️ | Ugh... Defeated by a man with that face... | く… この顔に負けるなんて | ||
| Be on NoName (Head)'s panel without fighting | Special Line 10 | ▶️ | ⏏️ | Fufu, look how miserable you are! | ふふ、ぶざまね | ||
| Be on QP's panel without fighting | Special Line 11 | ▶️ | ⏏️ | Actually, I rather like dogs. | 犬は嫌いじゃないわ | ||
| Opponent spends 30 seconds without moving | Special Line 12 | ▶️ | ⏏️ | Hey, still thinking? | ちょっと、まだかしら | ||
| Opponent spends 40 seconds without moving | Special Line 13 | ▶️ | ⏏️ | Make it quick. | はやくしなさいよ | ||
| Opponent spends 50 seconds without moving | Special Line 14 | ▶️ | ⏏️ | What's taking so damn long?! | そんなに何に手間取ってるのかしら | ||
| CPU takes over after a full minute of doing nothing | Special Line 15 | ▶️ | ⏏️ | *Sigh* I don't mind waiting, but I hope you'll get it together. | はぁ、待ってあげるけど、早くしてほしいものね | ||
| Get at least 7 in ATK using Deploy Bits(?) | Special Line 16 | ▶️ | ⏏️ | Bits, full power assault! | ビット!総攻撃よ! | ||
| Chapter 7 | Special Line 17 | ▶️ | ⏏️ | I think I'm done warming up now! | さて、そろそろ暖まってきたわね! | ||
| Be on Mimyuu (any)'s panel without fighting | Special Line 18 | ▶️ | ⏏️ | Oh, there's a tiny kitty cat... No, is that actually a human? | あら、ちっこい猫… いや、人かしら? | ||
| Be on Poppo (any)'s panel without fighting | Special Line 19 | ▶️ | ⏏️ | Oh, there's a tiny... What is this thing? | あら、ちっこい…なんなのかしら、これ | ||
| Defeat Shifu Robot | Special Line 20 | ▶️ | ⏏️ | Maybe I shouldn't have destroyed it? | こいつ…壊して良かったのかしら | ||
| When | English | Japanese | ||
|---|---|---|---|---|
| Opening the game | ▶️ | ⏏️ | Orange_Juice and Fruitbat Factory. | オレンジジュースアンドフルーツバットファクトリー |
| ▶️ | ⏏️ | Shindenken. | しんでんけん | |
| Title screen | ▶️ | ⏏️ | 100% Orange Juice! | 100%おれんじじゅ~すっ! |
| Start of player 1 turn | ▶️ | ⏏️ | Player 1. | プレイヤーワン |
| Start of player 2 turn | ▶️ | ⏏️ | Player 2. | プレイヤーツー |
| Start of player 3 turn | ▶️ | ⏏️ | Player 3. | プレイヤースリー |
| Start of player 4 turn | ▶️ | ⏏️ | Player 4. | プレイヤーフォー |
| Starting a battle | ▶️ | ⏏️ | Battle. | バトル |
| Winning a battle | ▶️ | ⏏️ | Win. | ウィン |
| Triggering a bonus panel | ▶️ | ⏏️ | Bonus. | ボーナス |
| Triggering a drop panel | ▶️ | ⏏️ | Drop. | ドロップ |
| Triggering a draw panel | ▶️ | ⏏️ | Card draw. | カードドロー |
| Triggering warp panel | ▶️ | ⏏️ | Warp. | ワープ |
| Triggering a move panel | ▶️ | ⏏️ | Move. | ムーブ |
| Triggering warp move panel | ▶️ | ⏏️ | Warp move. | ワープムーブ |
| Triggering a trap | ▶️ | ⏏️ | Trap triggered. | トラップ発動 |
| Skipping a turn | ▶️ | ⏏️ | Skip. | スキップ |
| Stopping on a panel affected by Immovable Object | ▶️ | ⏏️ | Stop. | ストップ |
| Triggering a norma check without meeting the requirements | ▶️ | ⏏️ | Norma check. | ノルマチェック |
| Reaching level 2 | ▶️ | ⏏️ | Norma level 1 achieved. | ノルマレベルワン達成 |
| Reaching level 3 | ▶️ | ⏏️ | Norma level 2 achieved. | ノルマレベルツー達成 |
| Reaching level 4 | ▶️ | ⏏️ | Norma level 3 achieved. | ノルマレベルスリー達成 |
| Reaching level 5 | ▶️ | ⏏️ | Norma level 4 achieved. | ノルマレベルフォー達成 |
| Winning the game | ▶️ | ⏏️ | Final norma achieved! | 最終ノルマ達成! |
| Attempting to connect to a lobby | ▶️ | ⏏️ | Connecting. | コネクティング |
| Successfully connecting to a lobby | ▶️ | ⏏️ | Connected. | コネクティド |
| Failing to connect to a lobby | ▶️ | ⏏️ | Failed. | フェイルド |
| Attempting to connect to a full lobby | ▶️ | ⏏️ | Lobby full. | ロビーフル |
| Another player joins the lobby | ▶️ | ⏏️ | Player joined. | プレイヤージョインド |
| Another player leaves the lobby | ▶️ | ⏏️ | Player left. | プレイヤーレフト |
Trivia
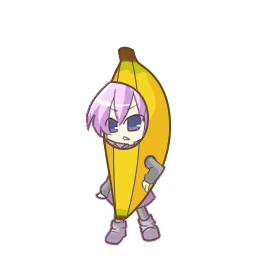
- Nanako appears in the artwork for and is quoted in the descriptions of Go Away,
 BanaNana, and Deploy Bits. She also appears in the artwork for Poppoformation.
 - Nanako's name means seven bits.
- She has seven bits in her Hyper card, gains 7 total stats from her Hyper, and has 7 bits in the Suguri games.